
Elevating PopTop Campervan Roofs
Elevating PopTop Campervan Roofs
Introduction to installing a campervan roof
An elevating roof can transform a van into a liveable area, adding the headroom needed for cooking, and the extra space for sleeping. Such a conversion isn’t as straightforward as it may seem. There’s more to it than simply cutting a hole in the roof and bolting on the new one; strengthening beams need to be added to make sure the roof remains rigid; measurements need to be accurate to make sure the hole that is cut out is covered by the elevating roof; care needs to be taken to avoid cutting through wires and damaging trim and glass with angle grinder sparks. We spent two days following the fitting of an elevating roof from Streamline PopTop Campervan Roofs to a 61-reg T5 Transporter. This particular conversion kit uses a rear-hinged GRP pop-top with canvas sides. The roof is made from fibreglass (commonly known as GRP) and is supplied with the hinges and gas rams already fitted. Strengthening consists of front and rear beams that are fixed to the underside of the roof, plus two sill shaped beams that are fixed over the sides of the hole in the roof. Whilst the main parts of a pop-top conversion consist of measuring up, cutting out a hole in the campervan roof, fitting strengthening beams, followed by the new elevating campervan roof, there are lots of other aspects to the conversion. The headlining needs to be removed and either adapted or new trim fitted. When fitting strengthening beams, They use plenty of Sikaflex silicone sealant to help prevent panel rattles and squeaks. They also rust protect any cut metal edges with paint.
Outline
We would class fitting a campervan roof as challenging but achieveable as long as you have the correct equipment, a basic knowledge of measuring out and cutting skills, and a general awareness to check carefully as you proceed.
With all purchases we provide fixings and diagrams showing plan and elevation of the van cut outs and elevating roof positions.
We ask that all customers read all instructions and information carefully and write down any questions that they would like to ask, but in most instances 75% of these will be answered by perseverance to observe our diagrams and your van for a reasonable period, before you ring to discuss further.
Each van has 5 stages
Look at all information and fixings / roof supplied, prepare the van move covers and wires to one side, place protection and prepare tools and work platforms.
Mark out carefully cross checking dimensions cut roof out and fit strengthening frames supplied.
Lift roof into position adjust then fasten
Test opening and closing
Fasten perimeter of the tent and fit trims seals etc
Please note there are certain things that must not be done, that we will advise you on with each type of unit.
Our staff will be available to talk you through each of these stages should you wish to do so.
Full details and sketches are provided with each unit.

Step One
Start by removing the headlining inside the van to move the wiring that runs along the underside. From inside the cab, the headlining and the trim down the pillars needs to be removed.
Step Two
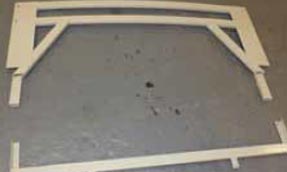
Front and rear strengthening beams are fitted on the underside of the van’s roof. The front strengthening beam needs to be trial fitted and marked to see where to cut the roof. Holes are drilled from inside to show where to cut.
Step Three
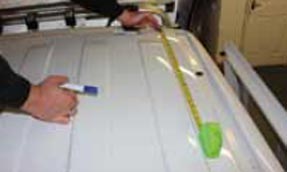
Sitting on the roof of the van, measurements can be taken to mark where to cut the large hole that will be covered by the elevating roof. These measurements line up with the holes cut in the last step.
Step Four
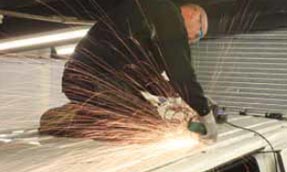
All glass and upholstery is protected (headlining is refitted) before cutting the roof. Use an angle grinder with cutting discs to remove the outer skin. They usually wear out half a dozen cutting discs.
Step Five
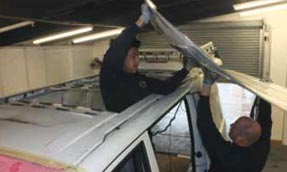
Once the outer skin of the roof has been cut out, the headlining can be removed again and the roof can be peeled off – it’s only held on with silicone to the roof’s strengthening beams. This large steel panel isn’t required anymore.
Step Six
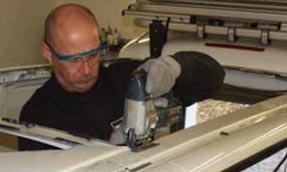
The strengthening beams that run across the hole in the roof need to be removed. They can be cut with an angle grinder and cutting disc, although the front-most one is easier to cut with a jigsaw and long blade.
Step Seven
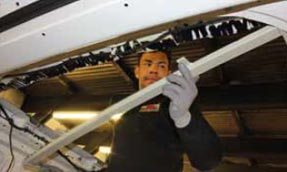
After painting the cut edges of the roof to stop corrosion, the front and rear strengthening beams are secured to the underside of the remaining roof using a Sikaflex silicone-based adhesive and pop rivets.

Step Eight
Two sill-shaped side beams are supplied in the kit and need to be trimmed to fit flush with the front and rear strengthening beams. These are also secured with silicone and pop rivets along the top and underneath.

Step Nine
With the strengthening for the elevating roof complete, the sides of the van are trimmed in carpet, then the elevating roof can be trial fitted, measured and marked to show its position on the van.

Step Ten
The elevating roof shown here uses hinges at the rear and gas rams at the front. Measurements are supplied in the kit to show where to drill mounting holes through the van’s existing roof gutter.
Step Eleven
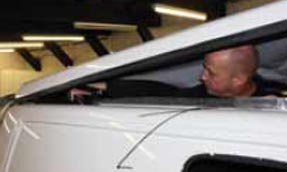
After drilling the mounting points for the elevating roof’s hinges and gas rams, the roof is fitted and secured in position. It needs to be raised to fit the gas rams, making sure there’s nothing in the way.
Step Twelve
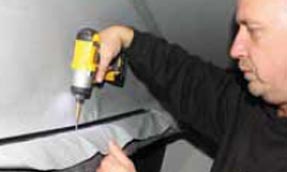
The final job in the conversion is to fix the canvas sides for the elevating roof. These are clamped, glued and screwed to the top of the van, making sure they are taut when the roof is raised and sit inside the roof when it’s lowered.

Finished
Once the project is finished, the first thing you’ll enjoy is avoiding a stiff neck or back; no longer needing to stoop to make a cuppa. There is something grand about stretching out and the feeling of light and space. But the most obvious benefit is that you can also make a two-berth camper into a fourberth camper – essential if you have kids. This key modification will add value to your bus as well as value to your experience, as your van becomes a campervan!
Visit : Unit 53 Hutton Close, Crowther Industrial Estate, Washington NE38 0AH, UK
Roof Sales & After Sales : 0191 419 1111 (Option 1).
Alternatively : Jason 07985 443 310 : Lee 07521 249 936 : Kevin 07484 881 672
Accounts : Stephen - 0191 419 1111 (Option 2)
Roof Fitting, Technical Support & Campervan Sales : Kevin - 0191 419 1111 (Option 3). or 07484 881 672
You are visitor number 1056014